
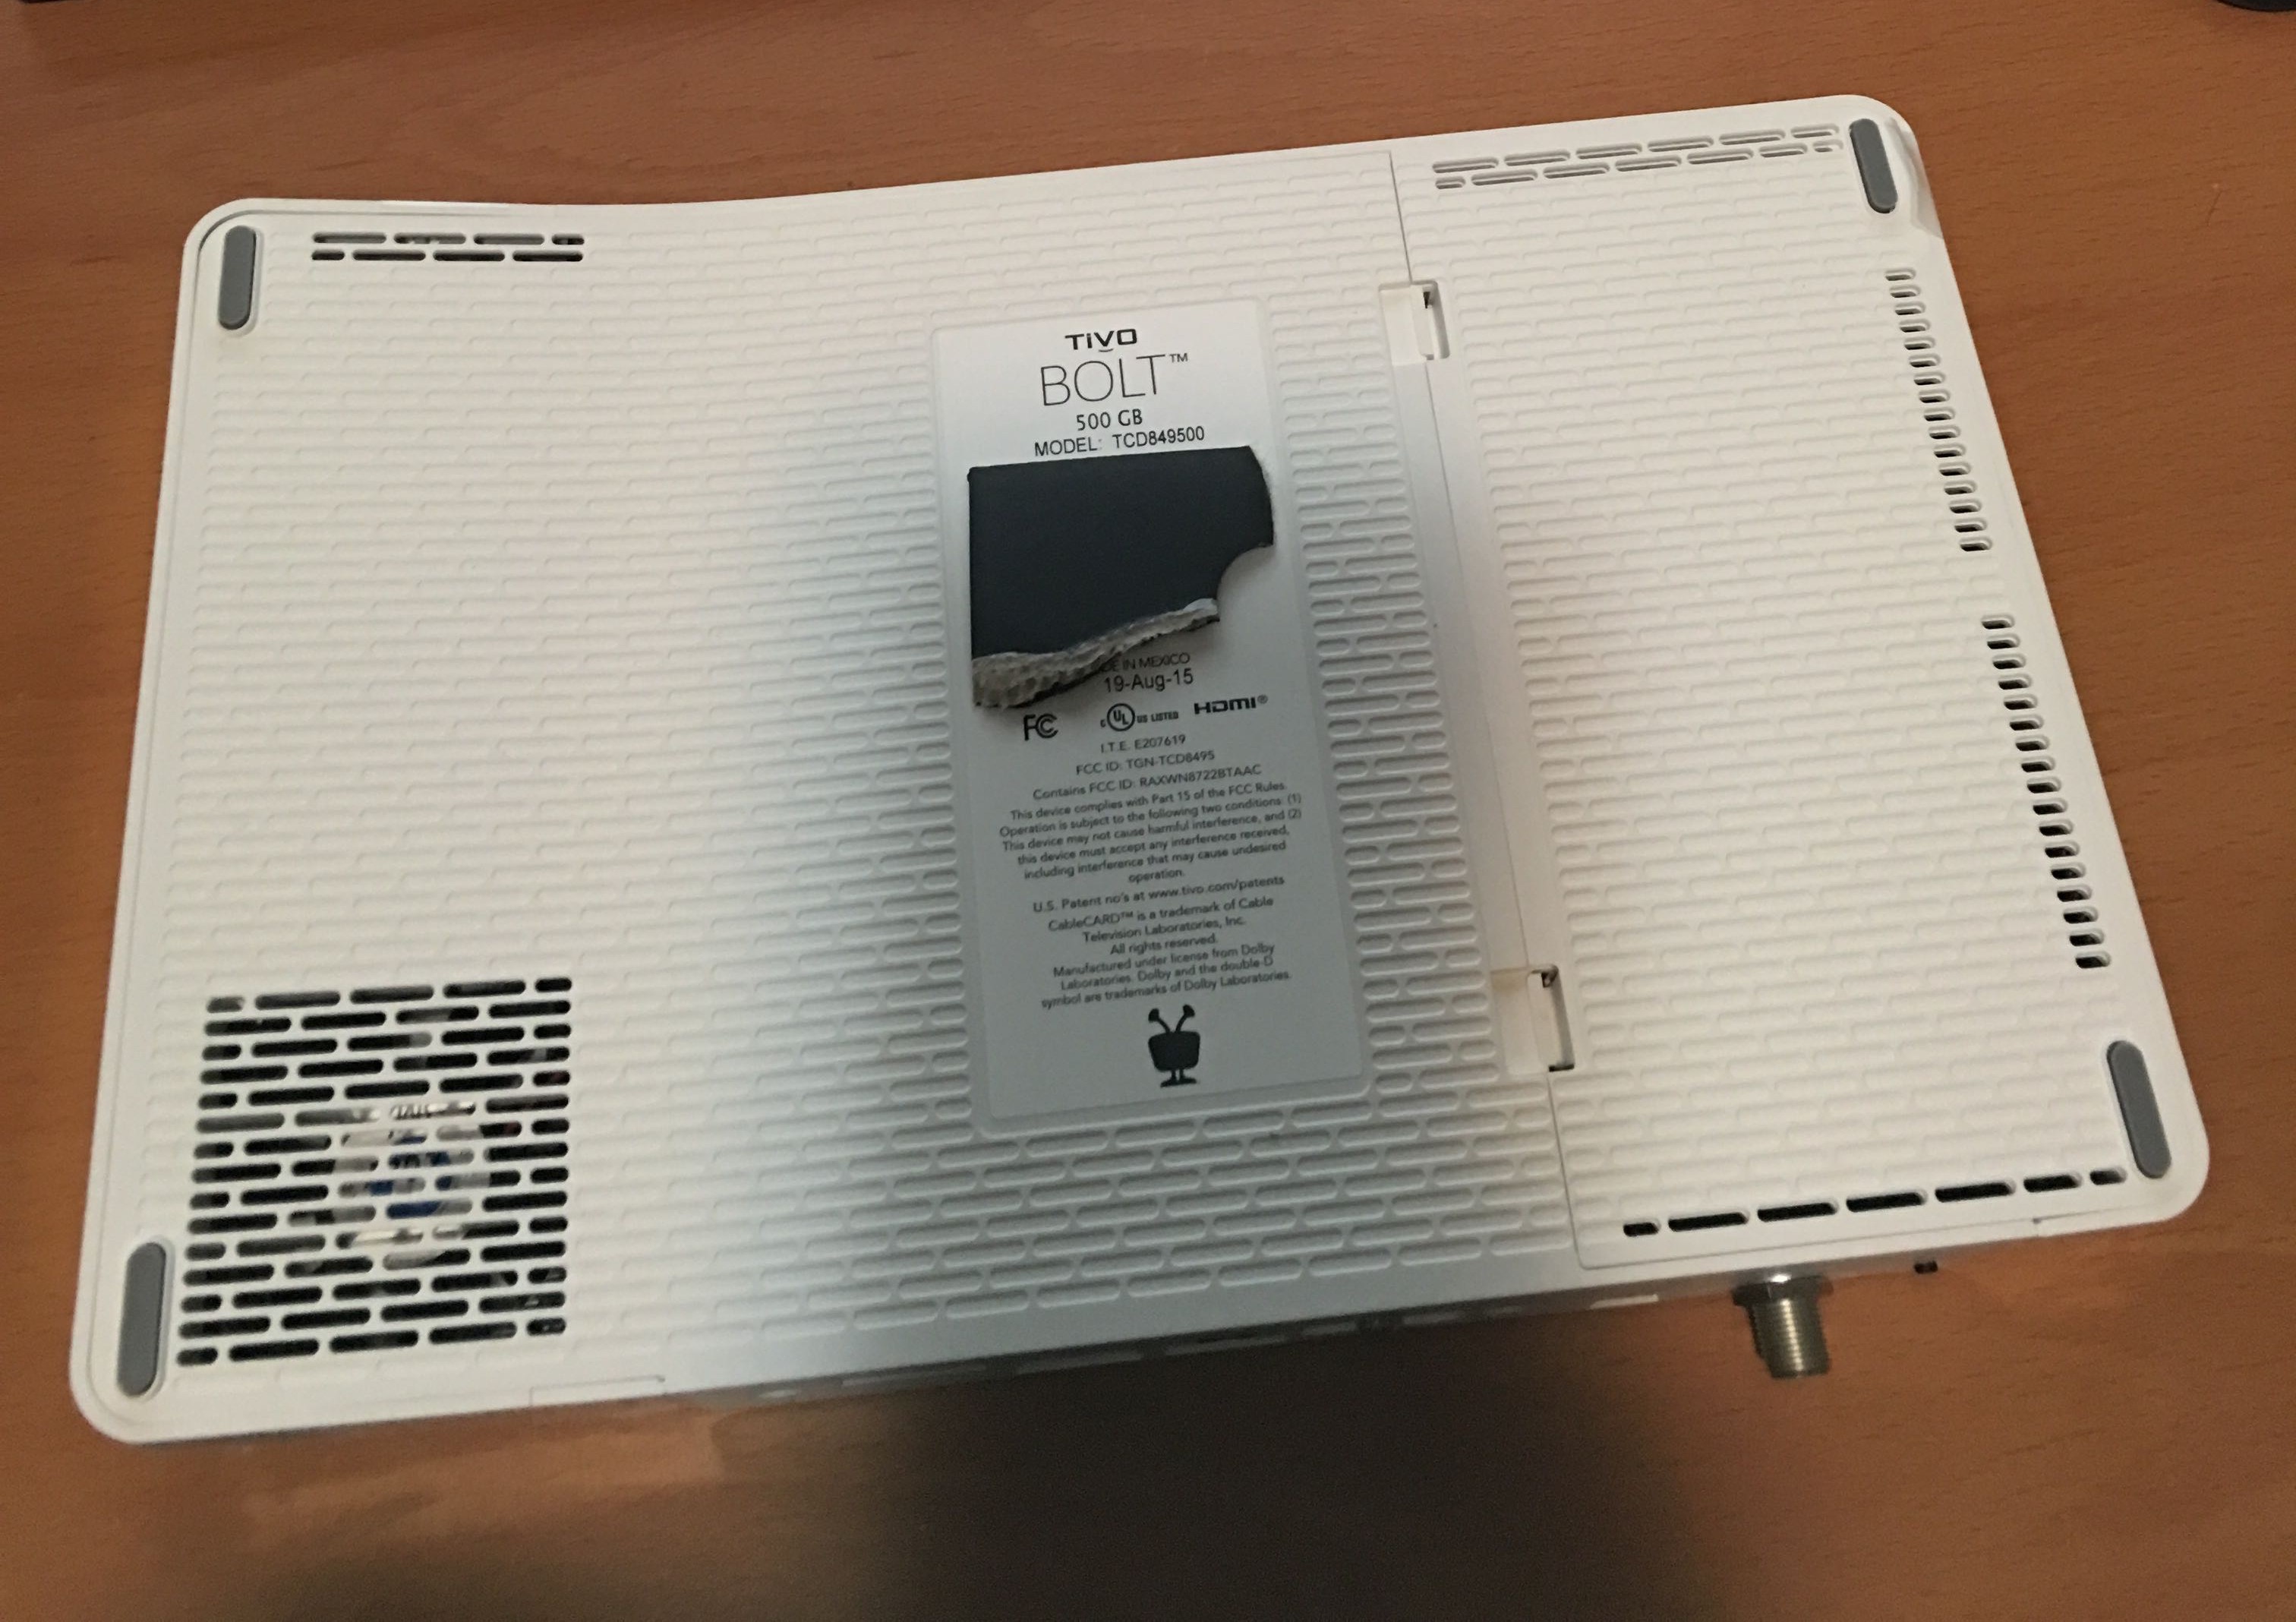
TiVo Bolt Hard Disk Upgrade and Take Apart
TiVo Bolt (The silly looking, bent TiVo) Hard Disk Upgrade.
I purchased the cheapest model having only a meager 500GB hard disk. The immediate plan is to upgrade to a 2TB hard disk, for which I have ordered a WD 2TB Green 2.5inch SATA drive to replace the internal disk. Initial reports from the Tivo Community Forums seem to confirm that it is the simple matter of swapping the hard disks in the same manner as the previous TiVo Roamio boxes.
I did have some thoughts in regard to adding a full size 3.5inch disk using a powered enclosure , and extending the internal SATA port. But, I am really trying to keep the equipment connected to my TV relatively simple, which of course, this cheesy look white box that doesn’t sit flat certainly does not help. But, if it performs… so be it. Maybe a complete TiVo Bolt internals to a retired TiVo HD case?
- First step, open the crooked little box, is to open the cable card tray.
- There are two Torx screws along the edge, and another by the HDMI port.
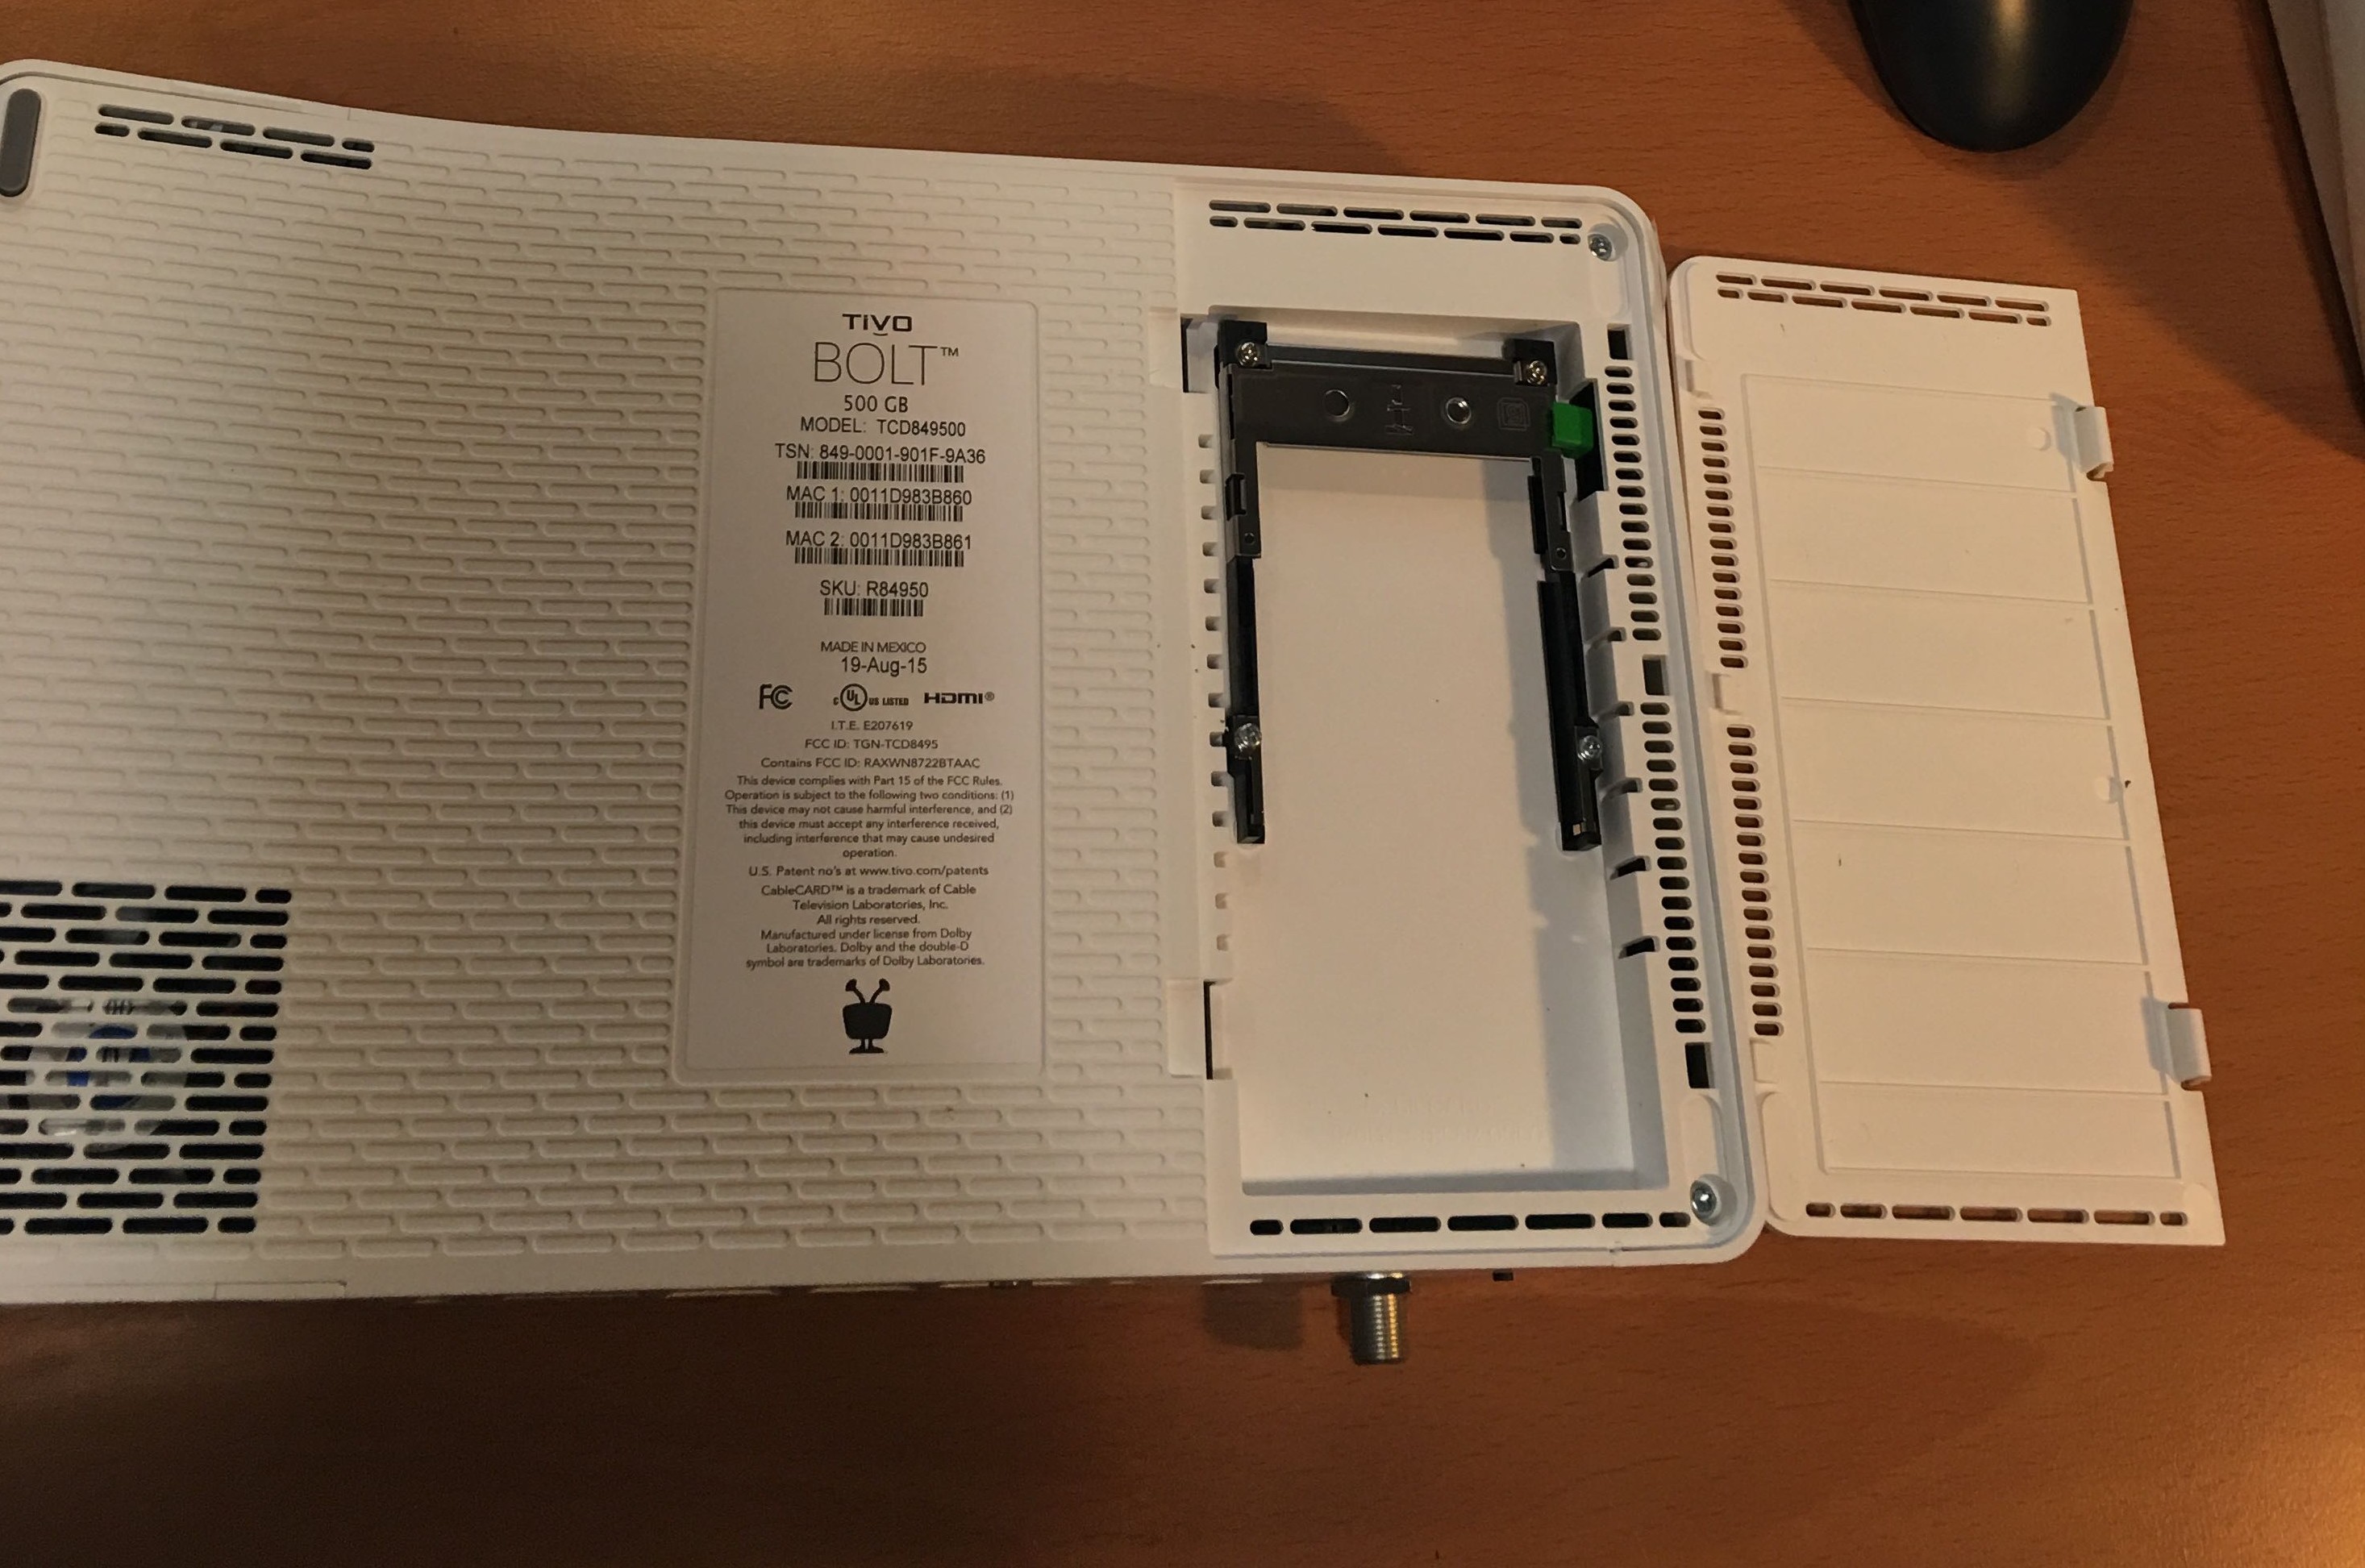
- After removing these screws, you can now open the shorter section of the bent case.
- There are three Torx screws along the edge that will need to be removed.
- After removing those three screws, you can remove the top lid entirely.
- The case snaps together, so just work your way around carefully and you might not break the thing.
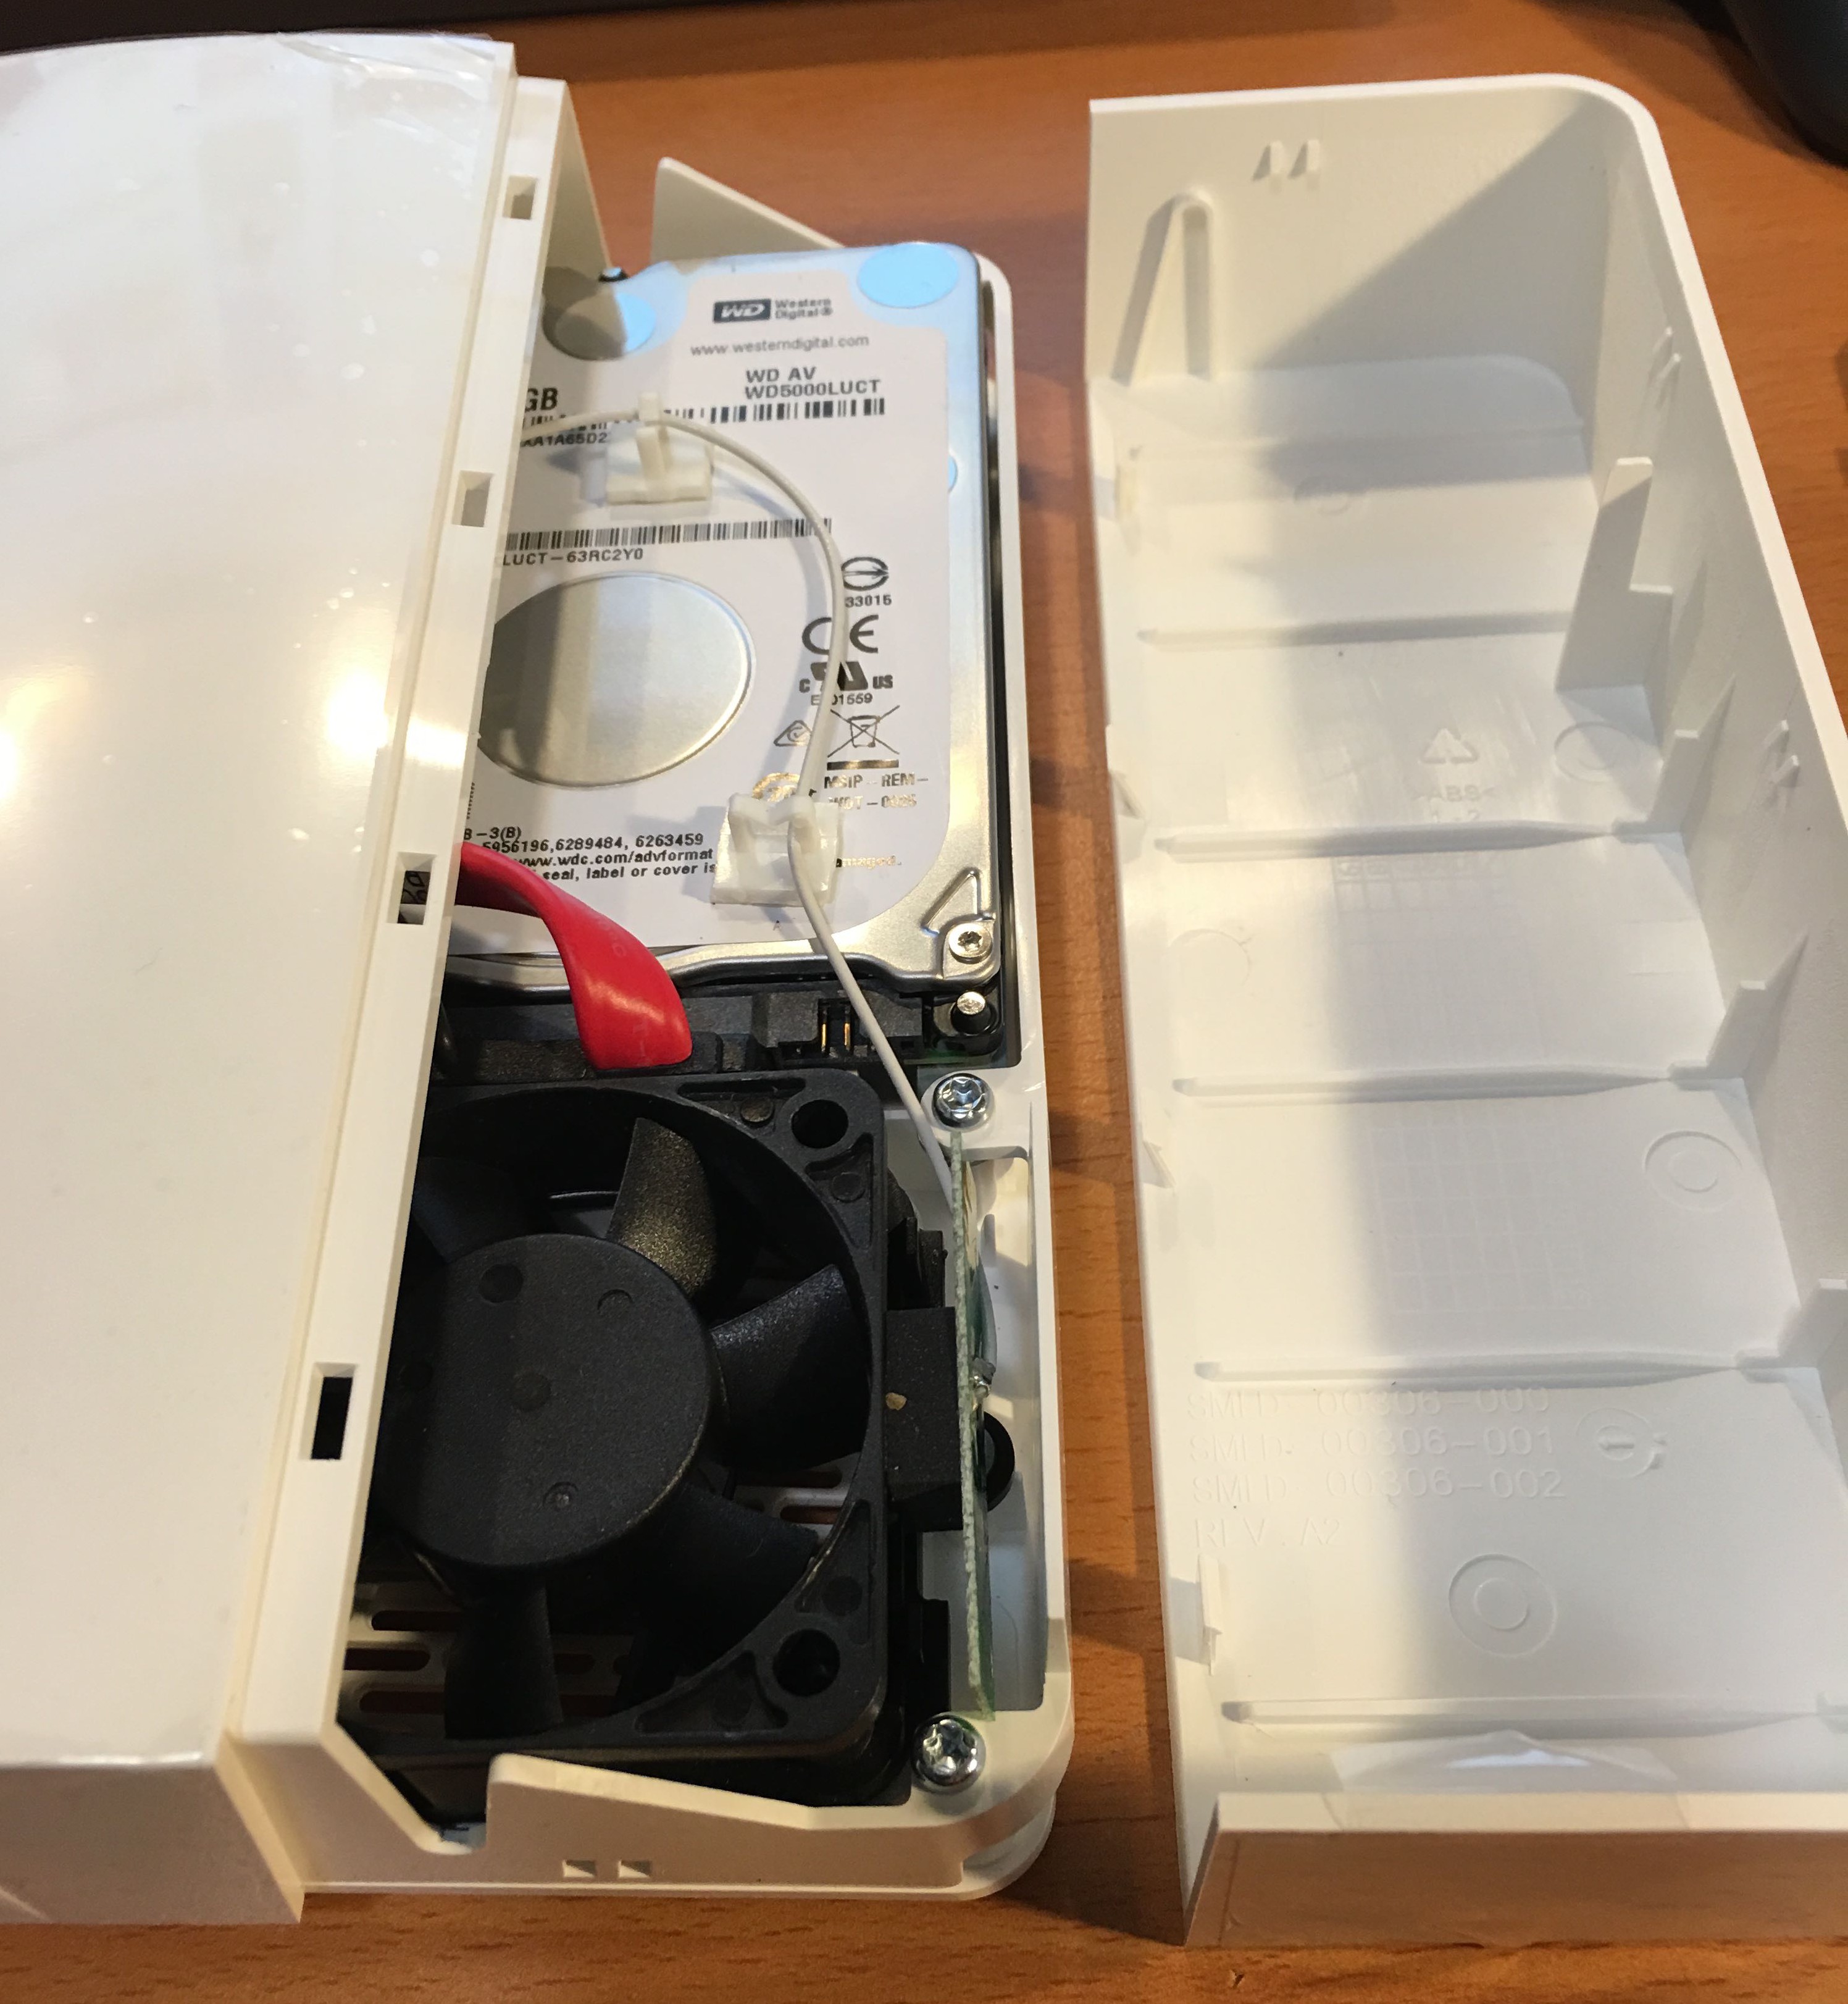
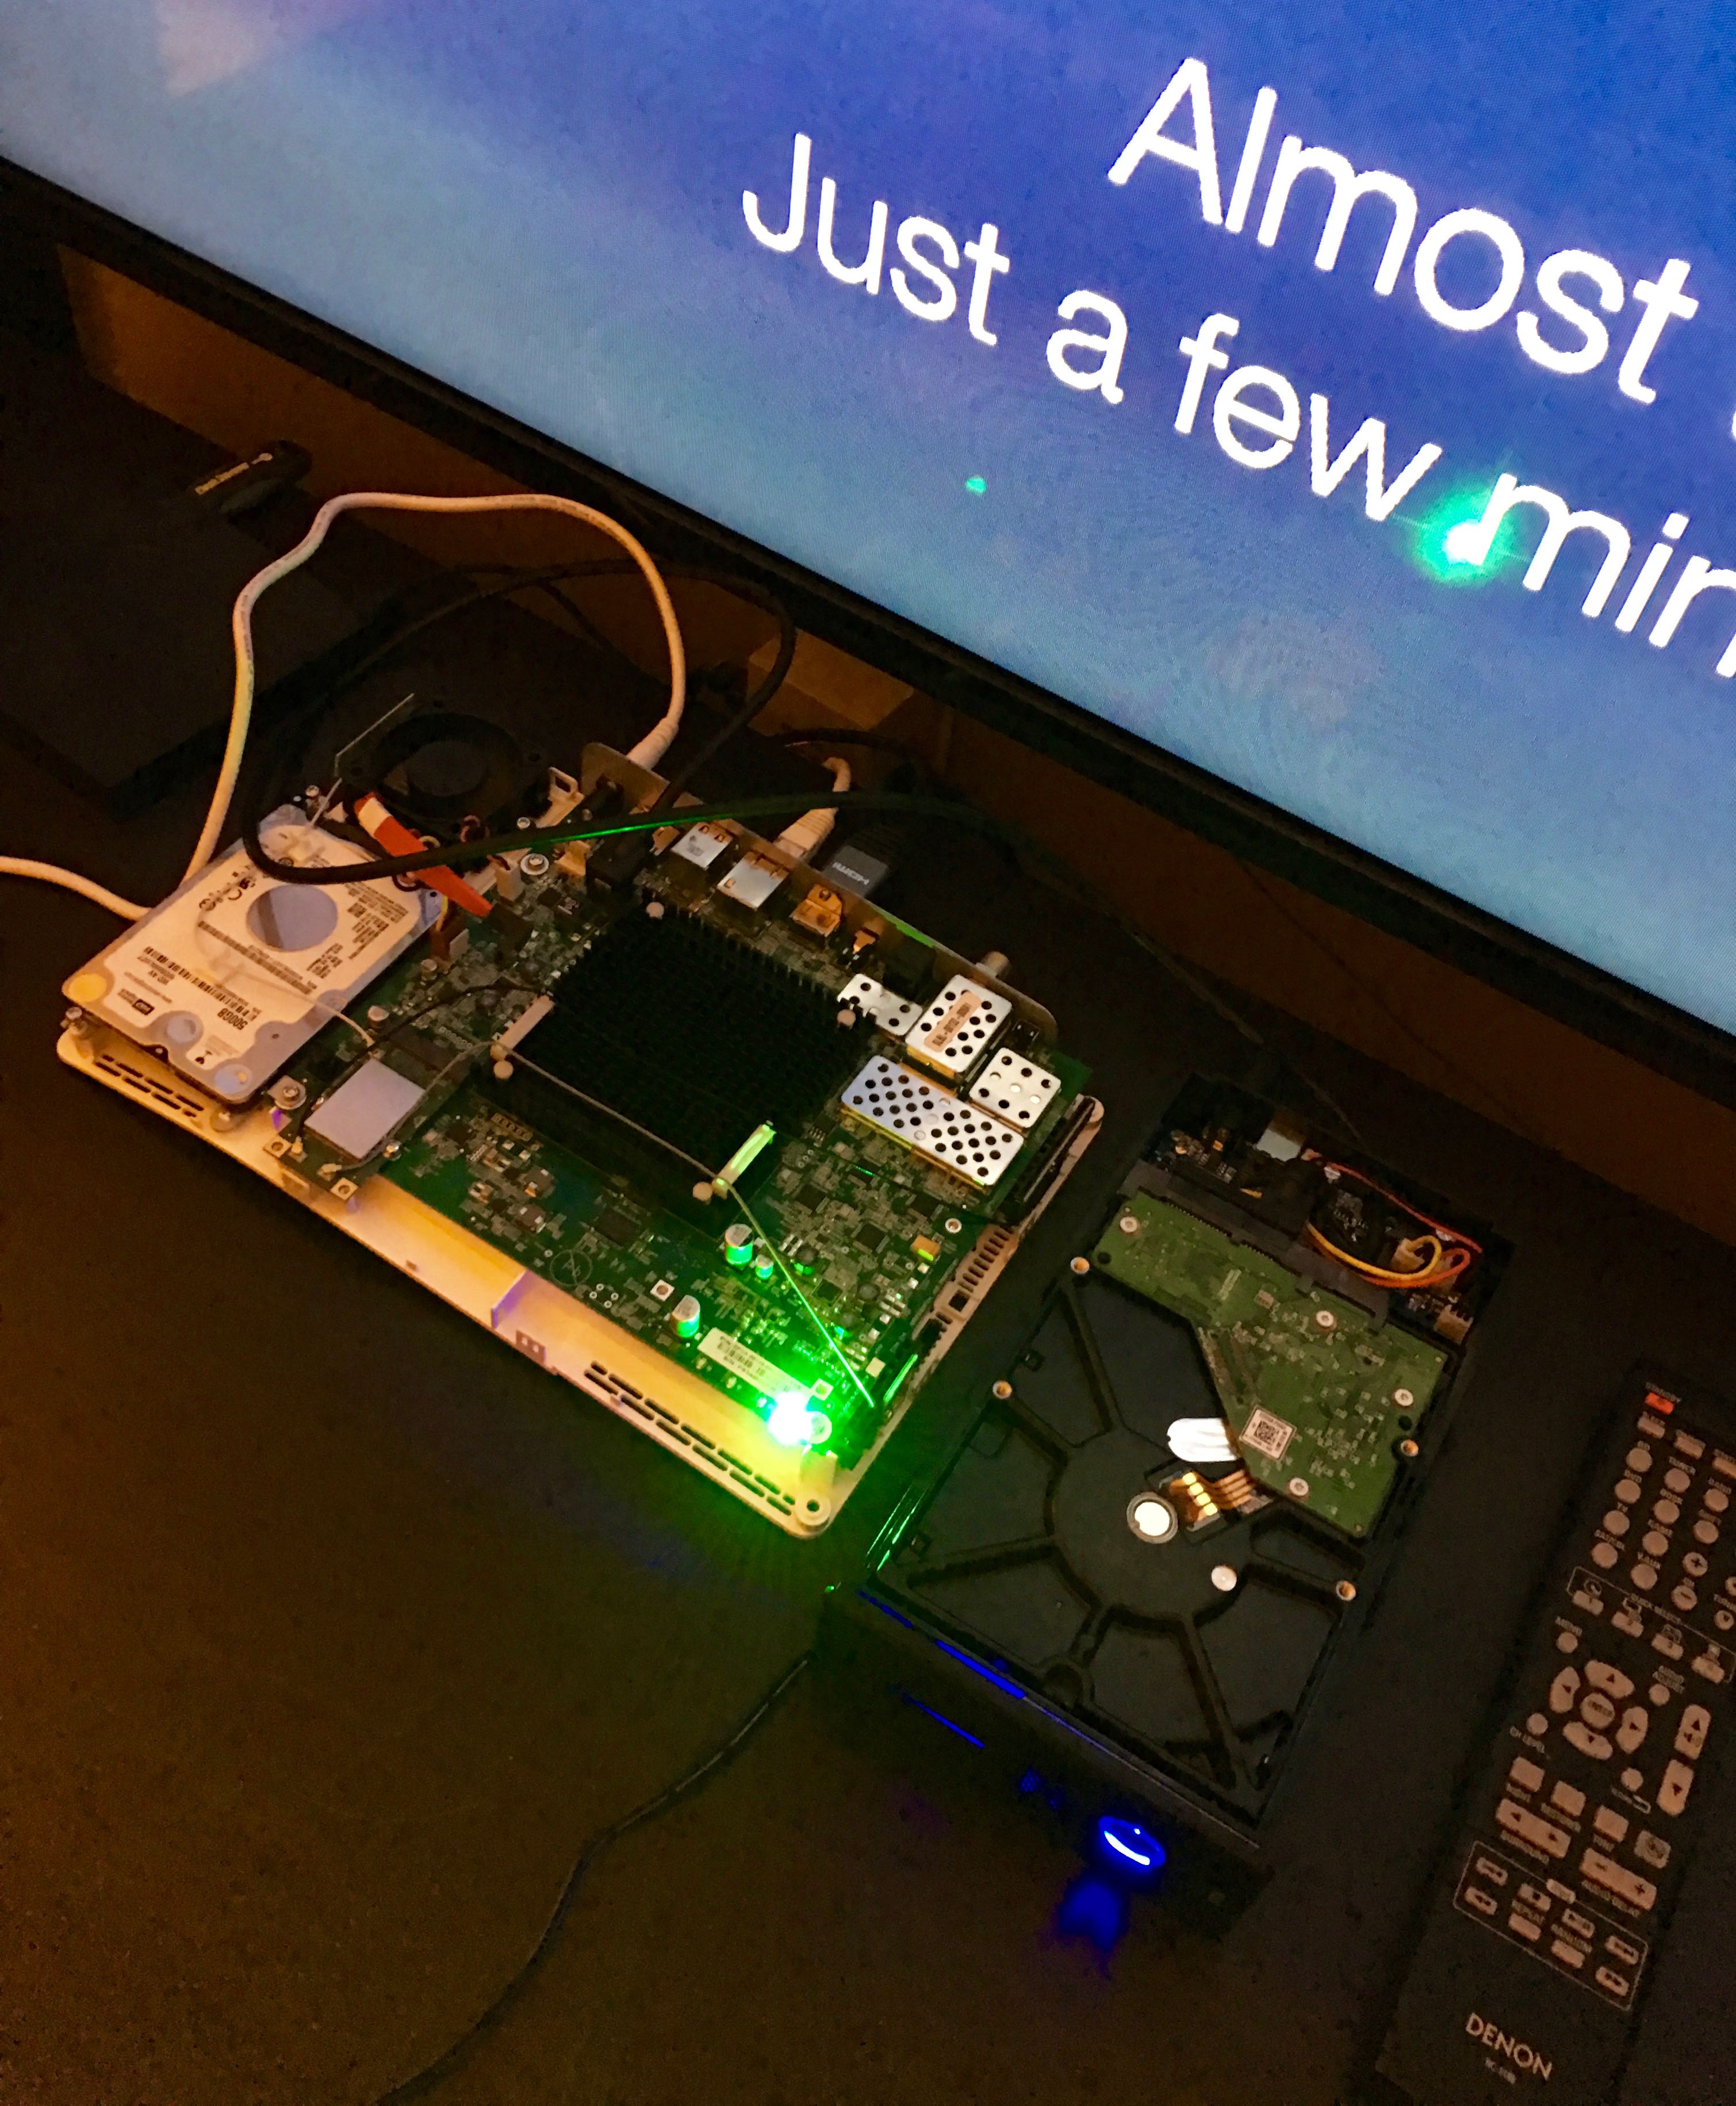
- Then it’s just the matter of swapping out Hard Disks
- As far as height, should be good to use virtually any 9-15mm 2.5inch SATA disk.
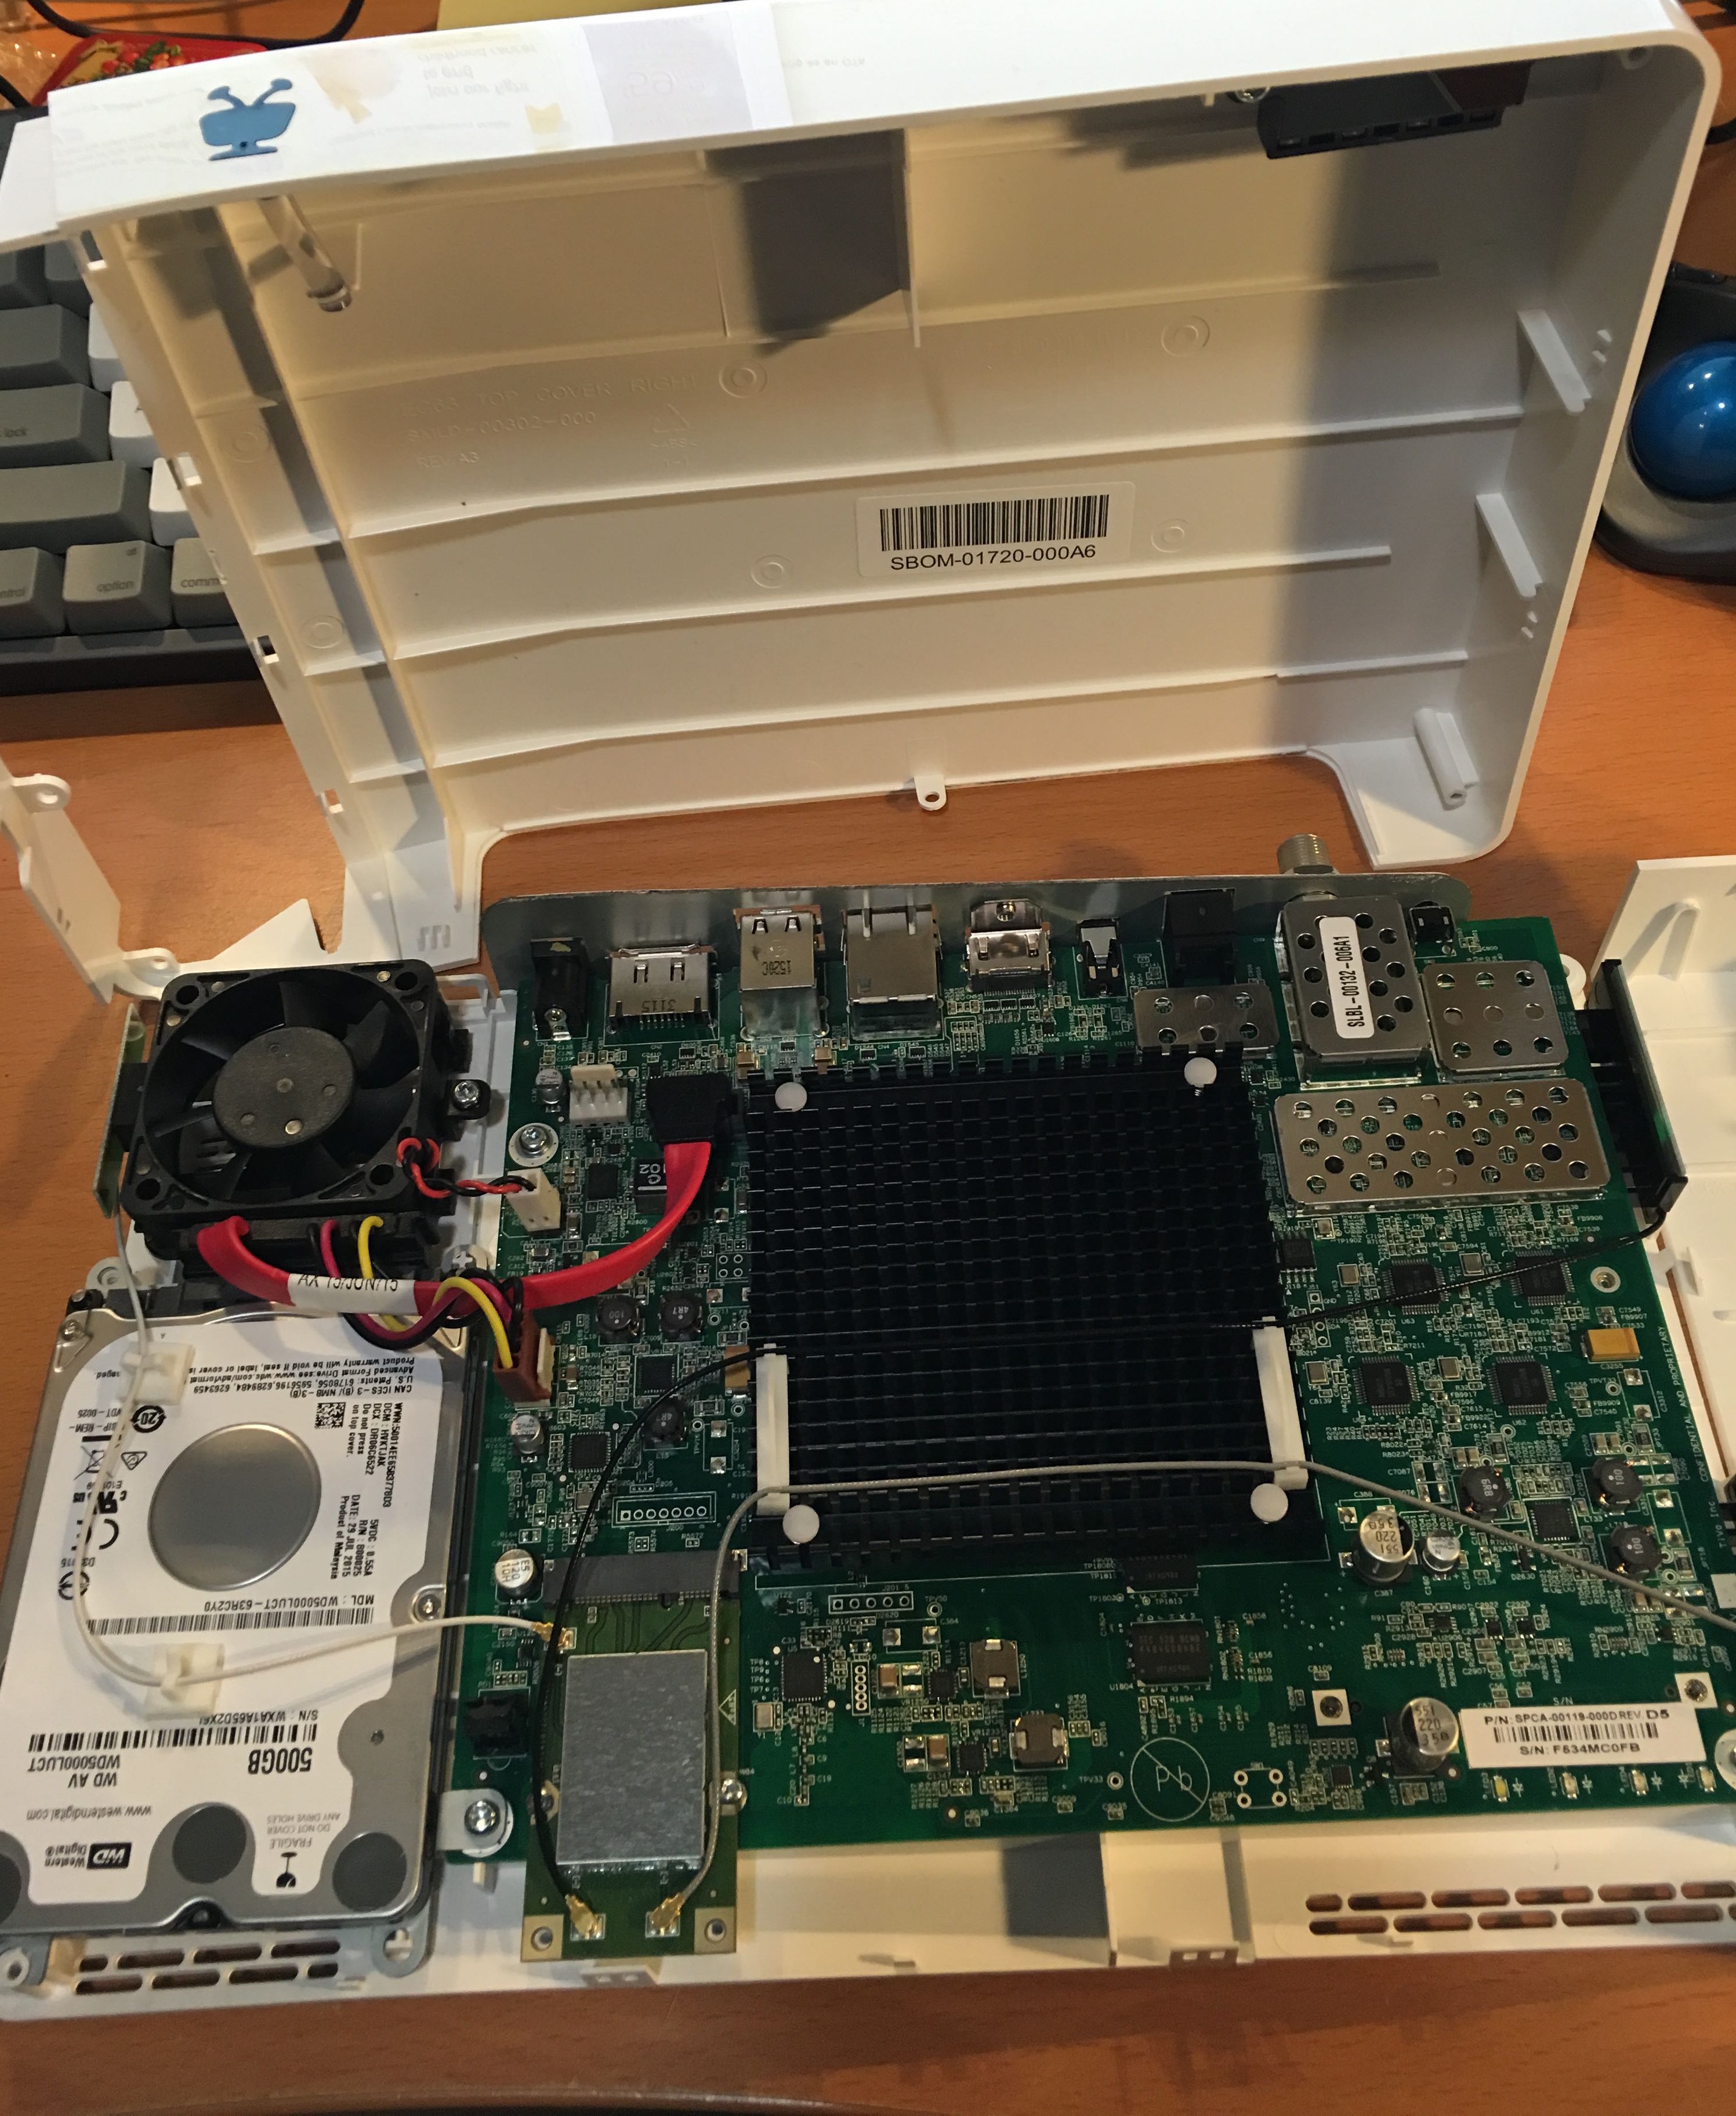
The tiny case makes for a big wall-wart of a power supply.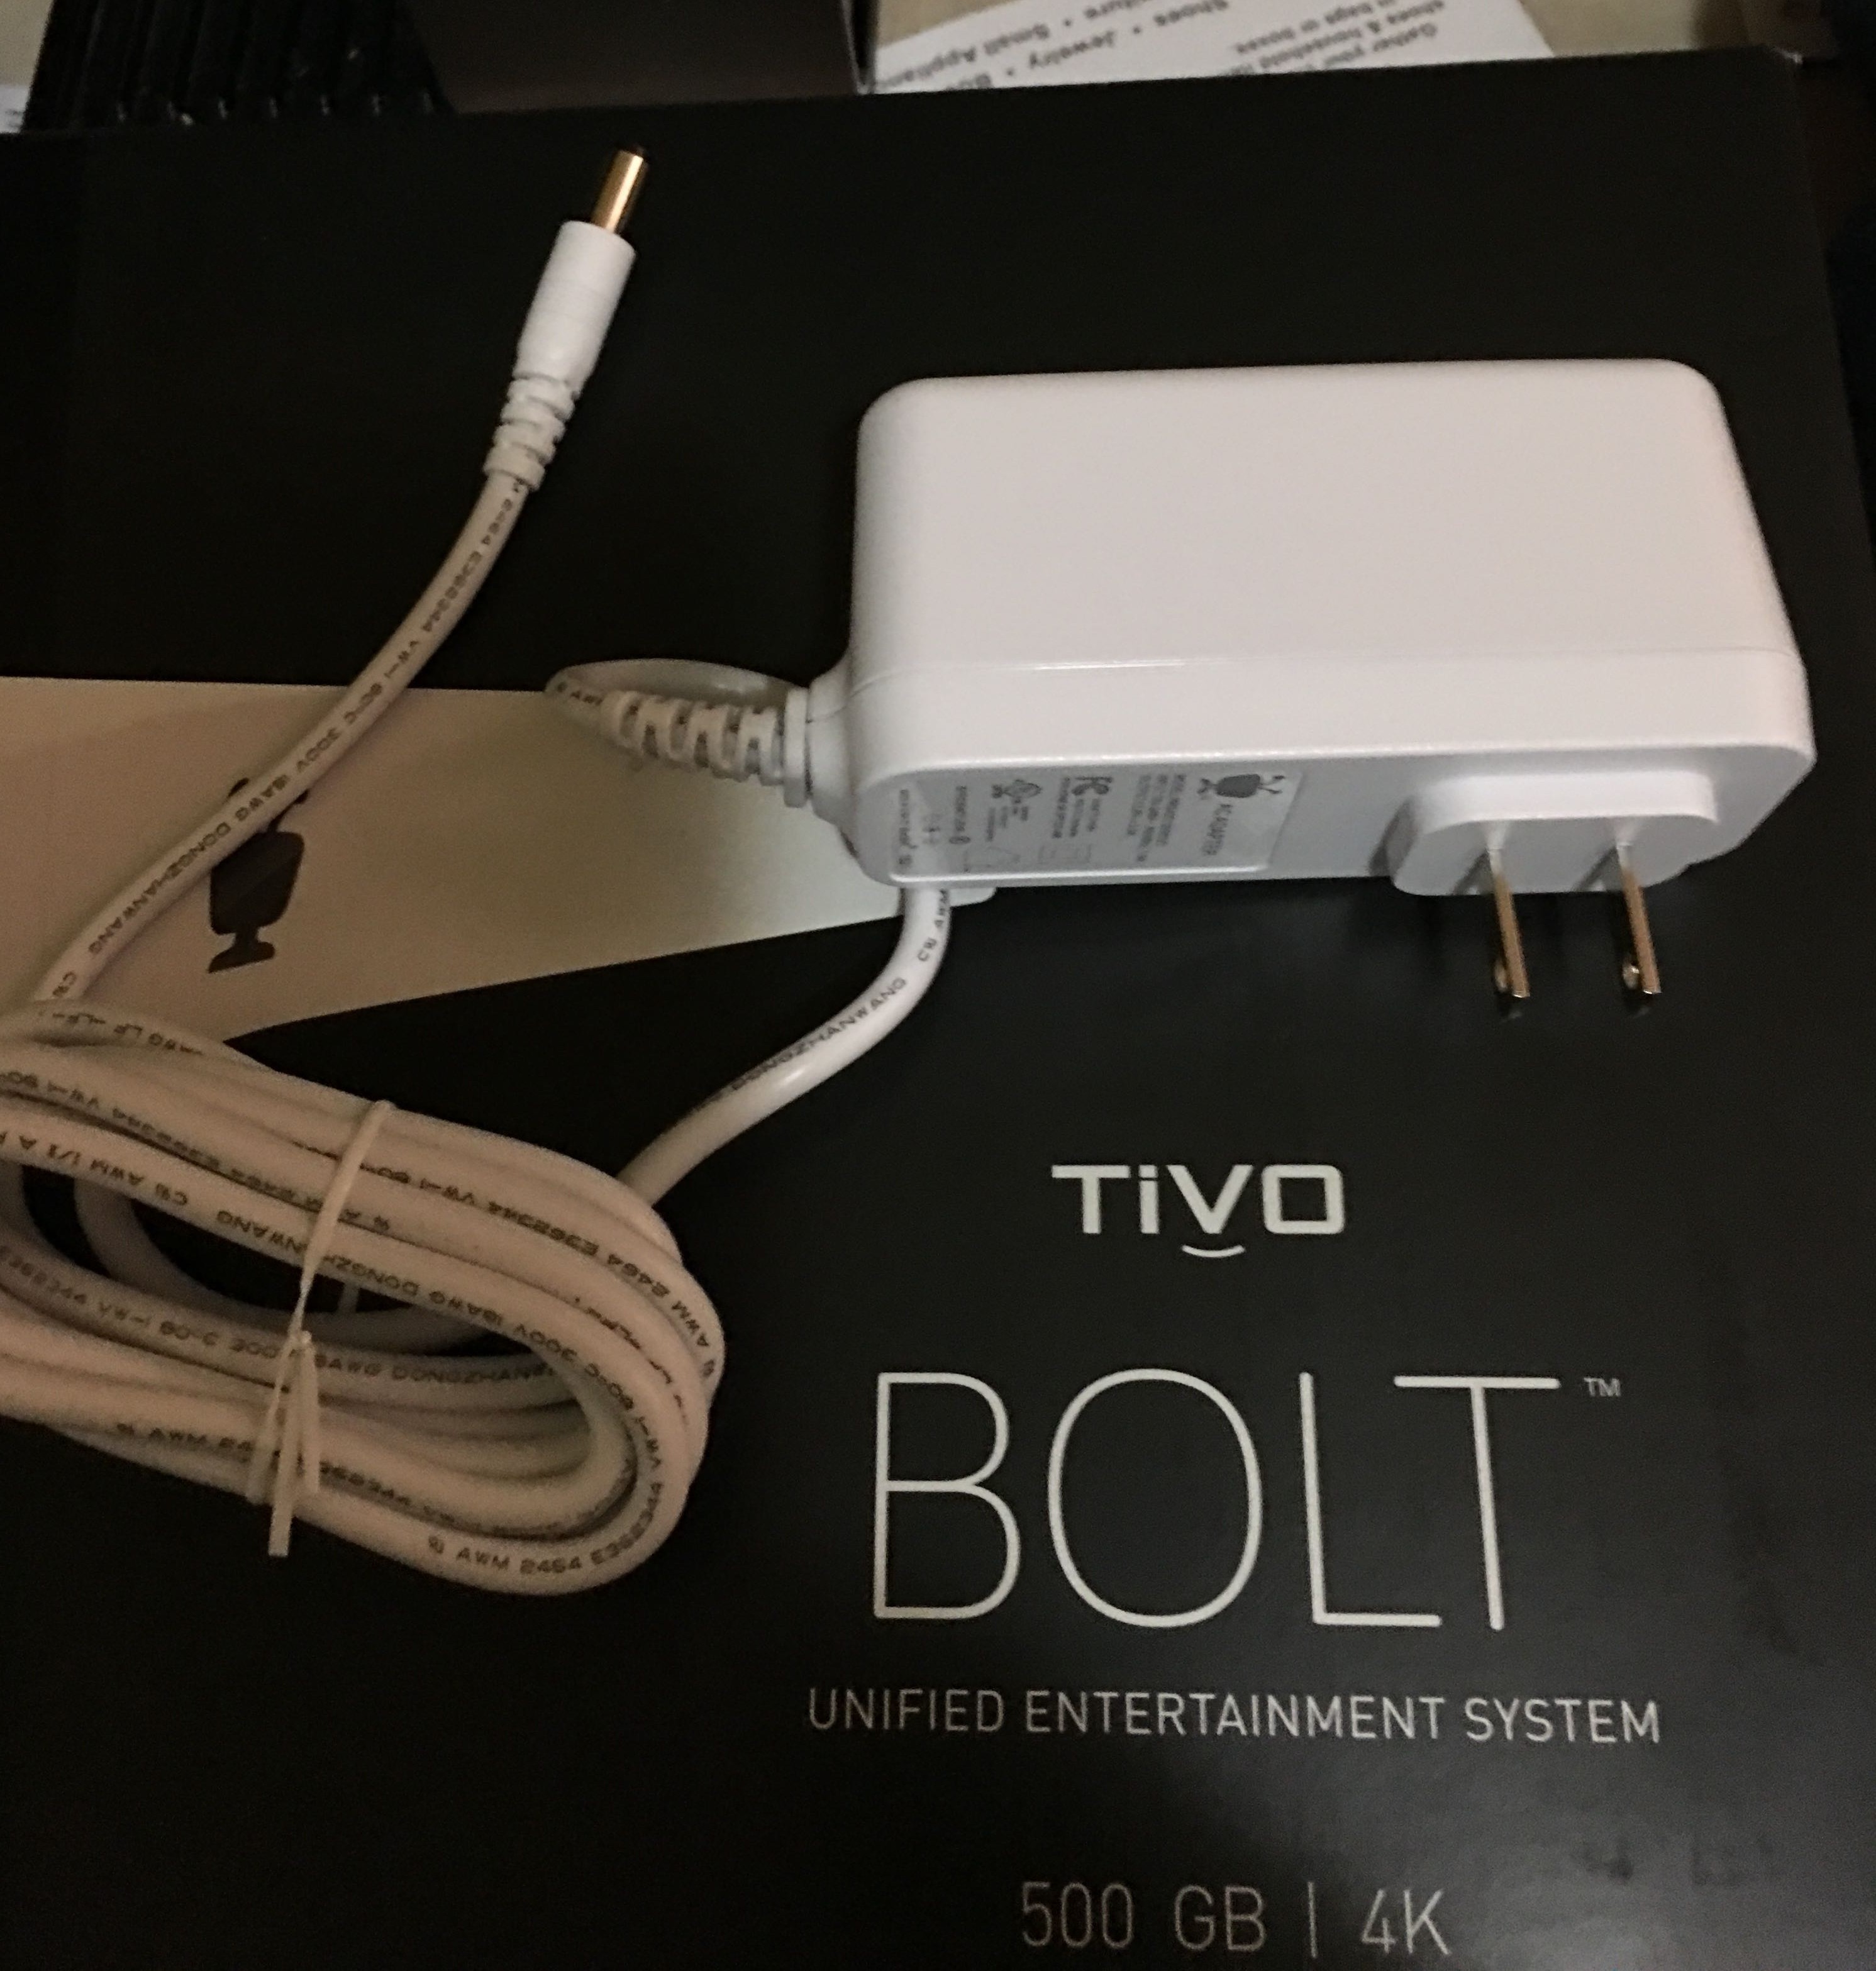
 Update: Ended up deciding to run a SATA cable out of the case of the Bolt and into a 3.5inch enclosure which will provide the power for the Western Digital 3TB Red hard disk.
I purchased a 36-inch rounded SATA cable which has one SATA connector as a right-angle so that it fit nicely in the Bolts case when closed. I will then cut a tiny notch in the back plate in order to run the SATA cable out of the Bolt so that the case can be closed.
Both the Bolt and the external drive will be out of sight, living their life forever entombed within my equipment cabinet, so I’m not at all concerned having a cable running outside of the unit. The hard disk enclosure simply provides power to the disk. It does also have a small fan to keep it cool.
The 3TB disk that I installed provides an estimated 367 hours of HD recording. This is less than what was reported on the previous Roamio using the same size disk, but as others have reported seems to be the same across the board for all updated Bolts (keeping a ~20% reserve for whatever purpose).
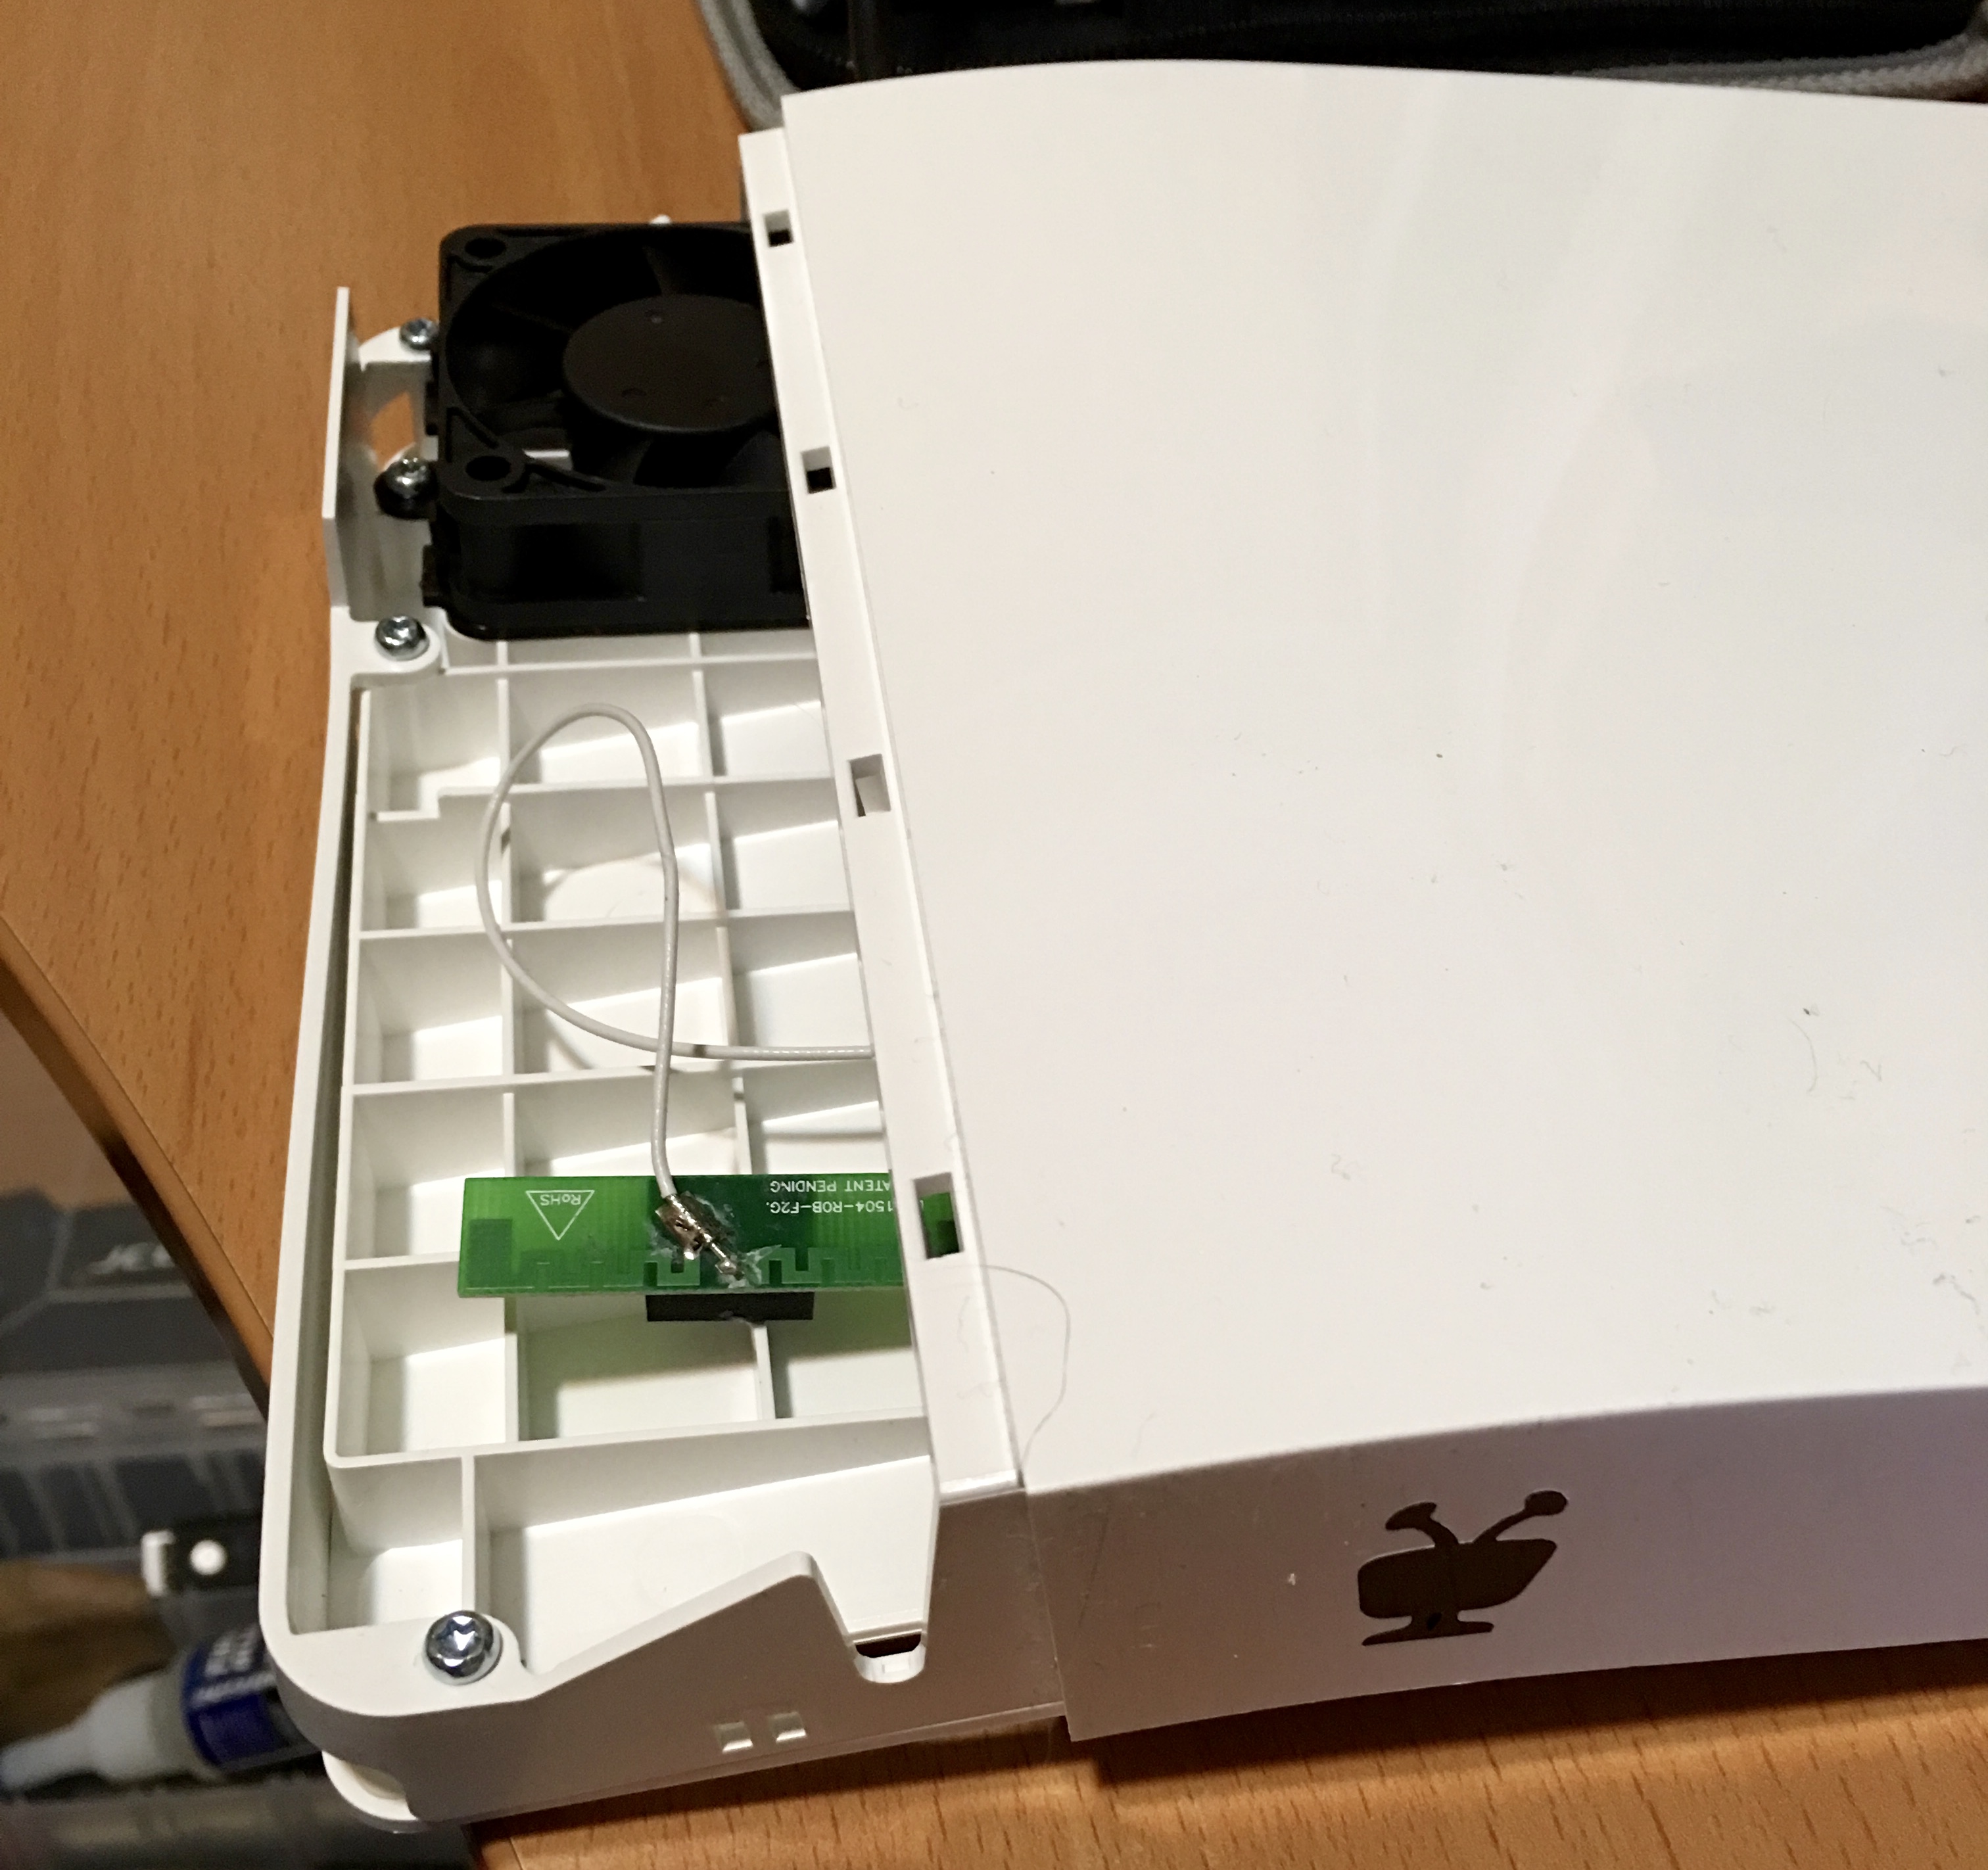 Putting the Bolt back together without the internal disk.
Relocated the antennae that was previously stuck to the fan (for no real reason other than I could).
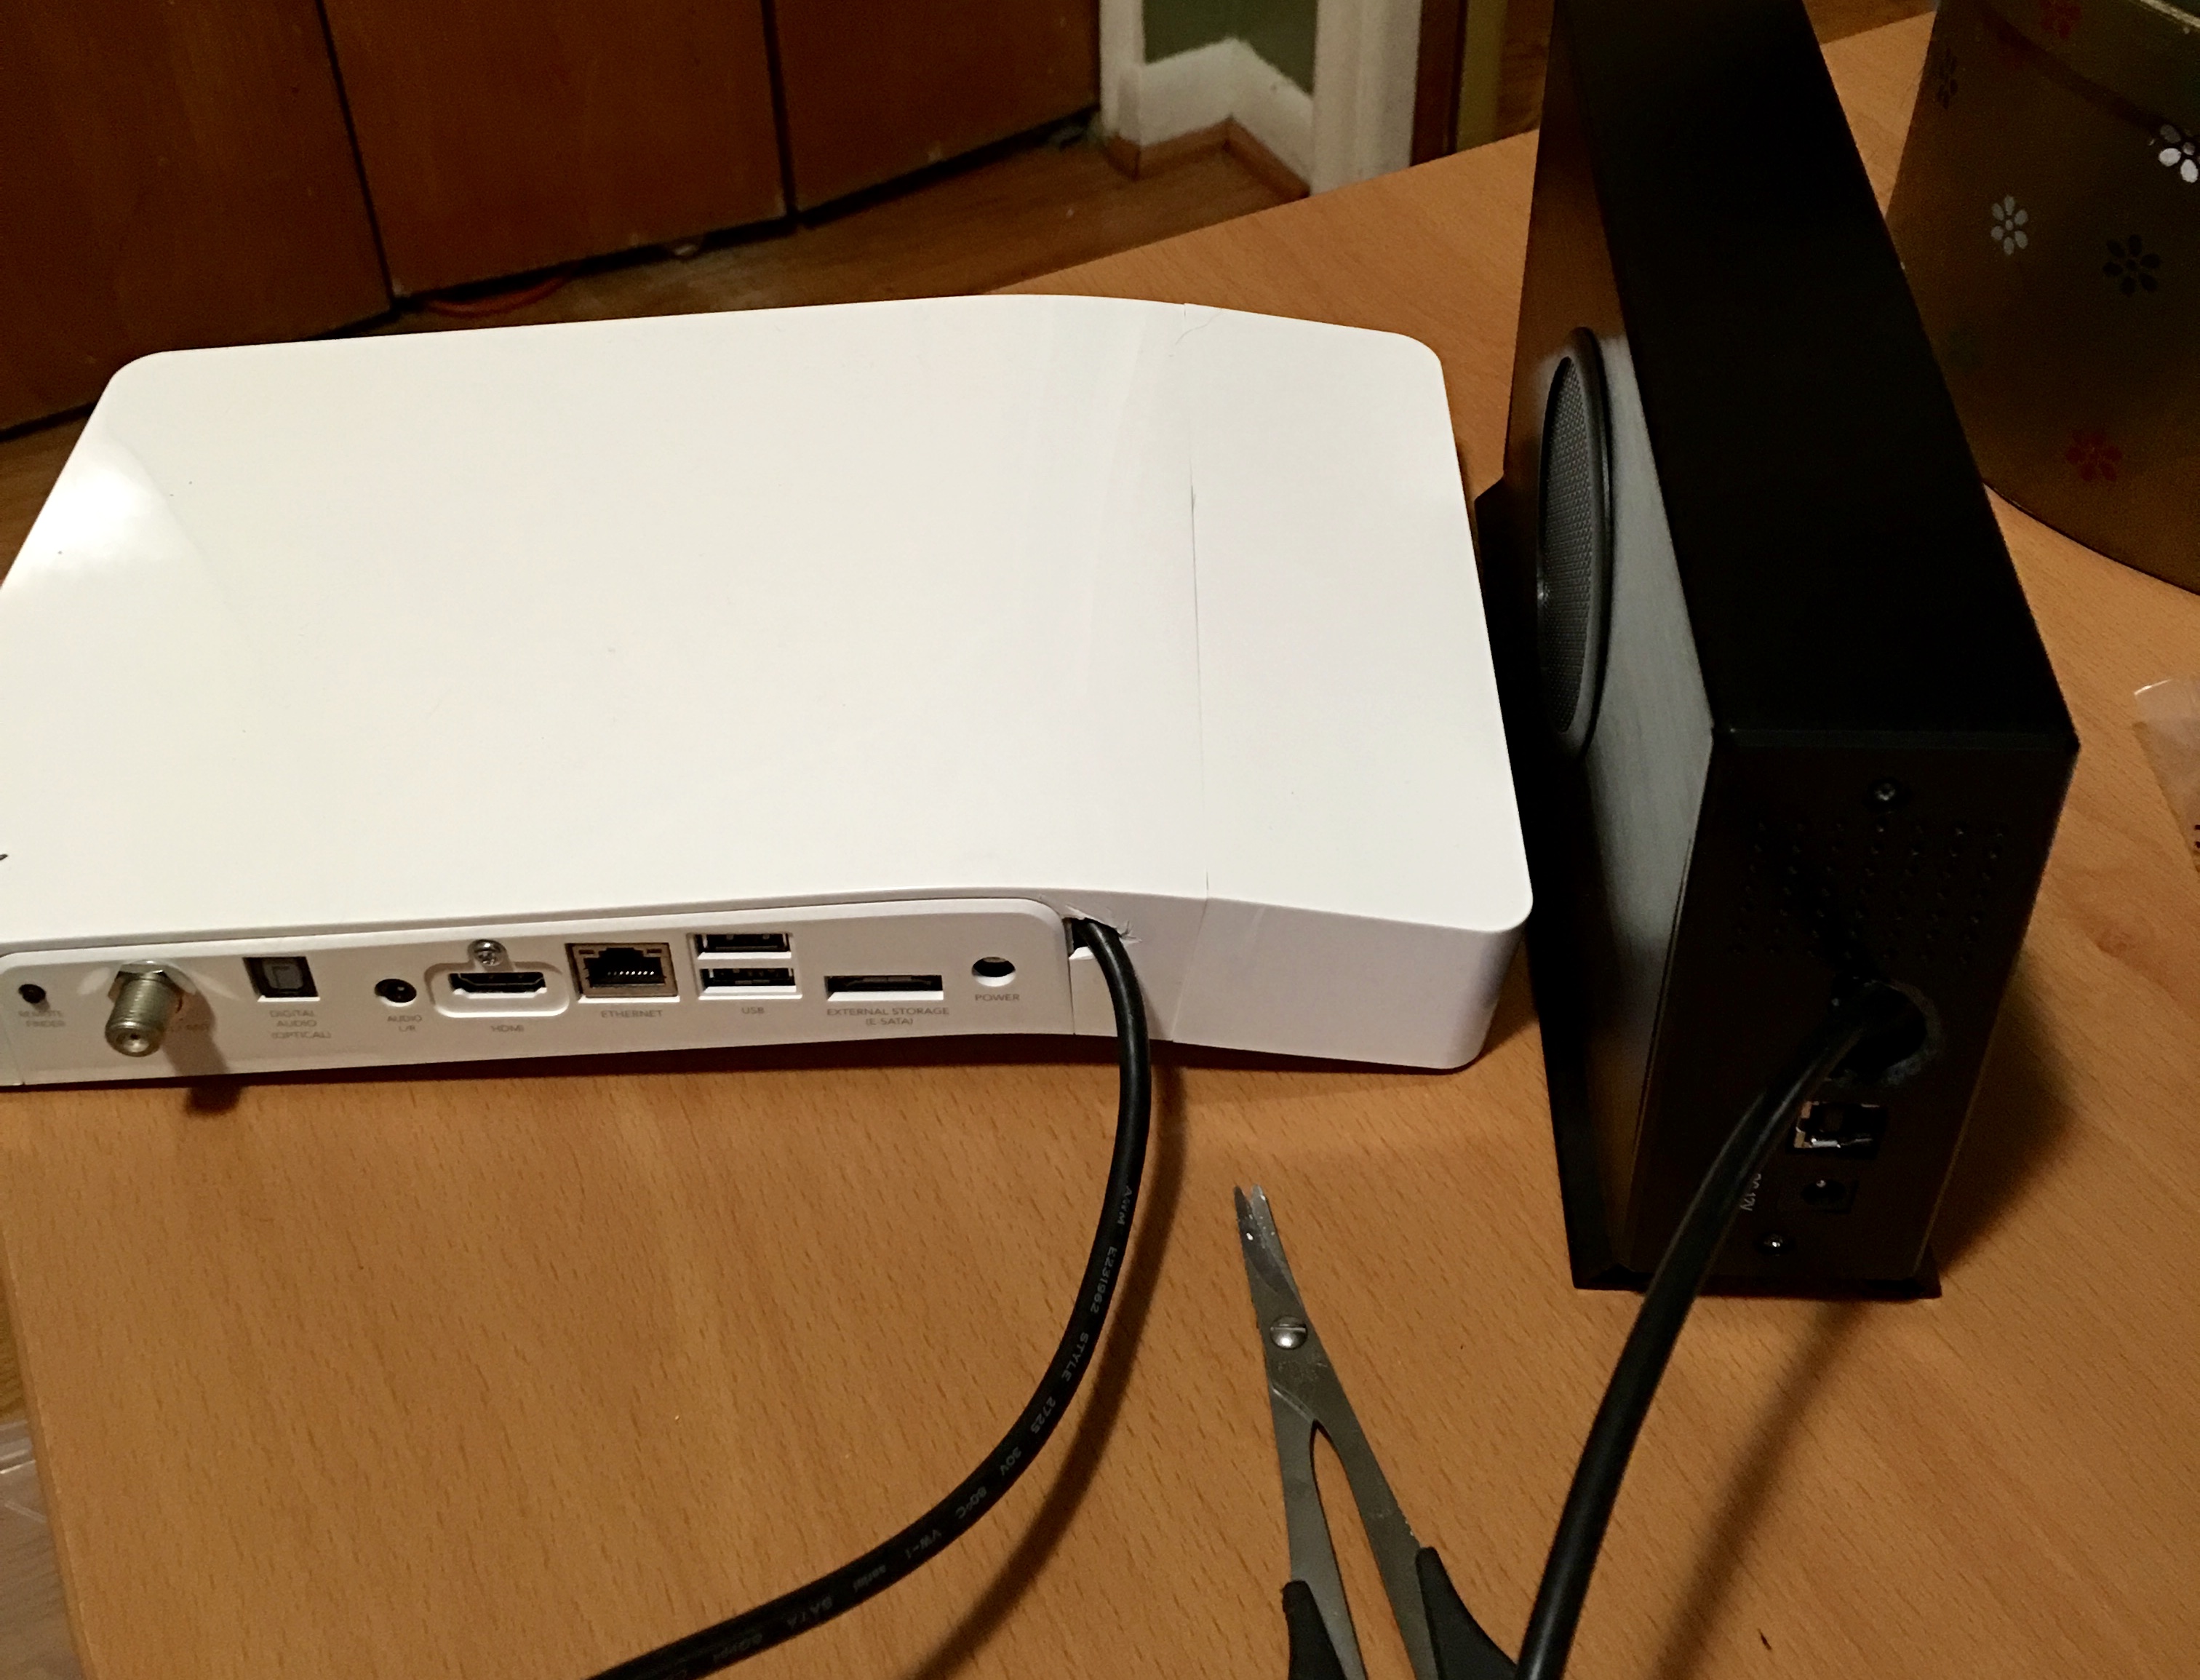 Picture showing the hastily cut holes in back of the Bolt and the disk enclosure. Thin plastic which was easily cut with pair of lexan scissors I had lying around.